Here is a collection of all of my practice work, leading up to my final assessment.
General skill enhancement :
World Skills
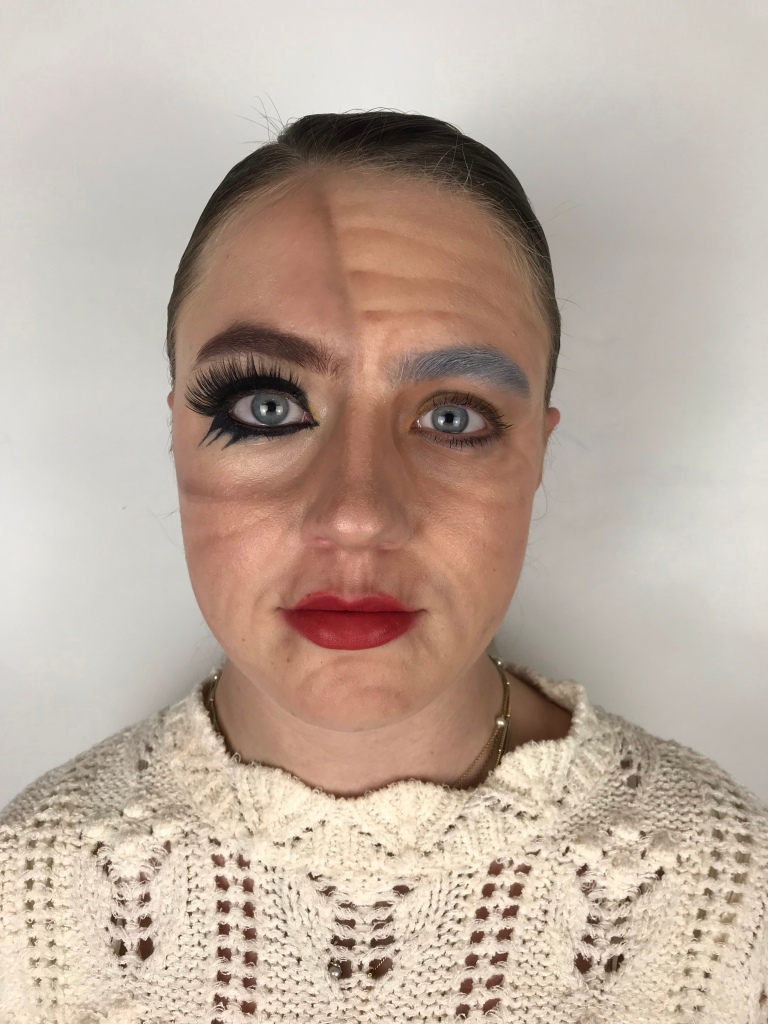
This year I entered the world skills commercial makeup competition, the theme was “Its a wild life.” As previously mentioned in my project proposal, one of the biggest targets I have set myself for this project was to ensure I pushed the boundaries of my briefs, allowing me to really explore the creative side of makeup.
As you can clearly see in the photo below, I ensured to meet this target, by really exploring this brief, and what it could potentially mean. Rather than sticking to my initial thoughts of wild animals, and animal prints, I decided to look in to the idea that you don’t really know anybody, or what they have been through upon your first meeting.
I created a look representing an older woman, looking back on her younger days, and reflecting on all the ‘wild’ things she has experienced, and achieved.
I am extremely impressed with the finished result of this look, and love how my attention to detail really paid off in the end, as the ageing makeup looks brilliant.
Furthermore, I had many compliments on this look, including someone asking me if the wrinkles were a prosthetic piece! This helped to really build my confidence in my line and shadowing work, which I am really happy about as I love creating intricate details by hand.
Body Painting
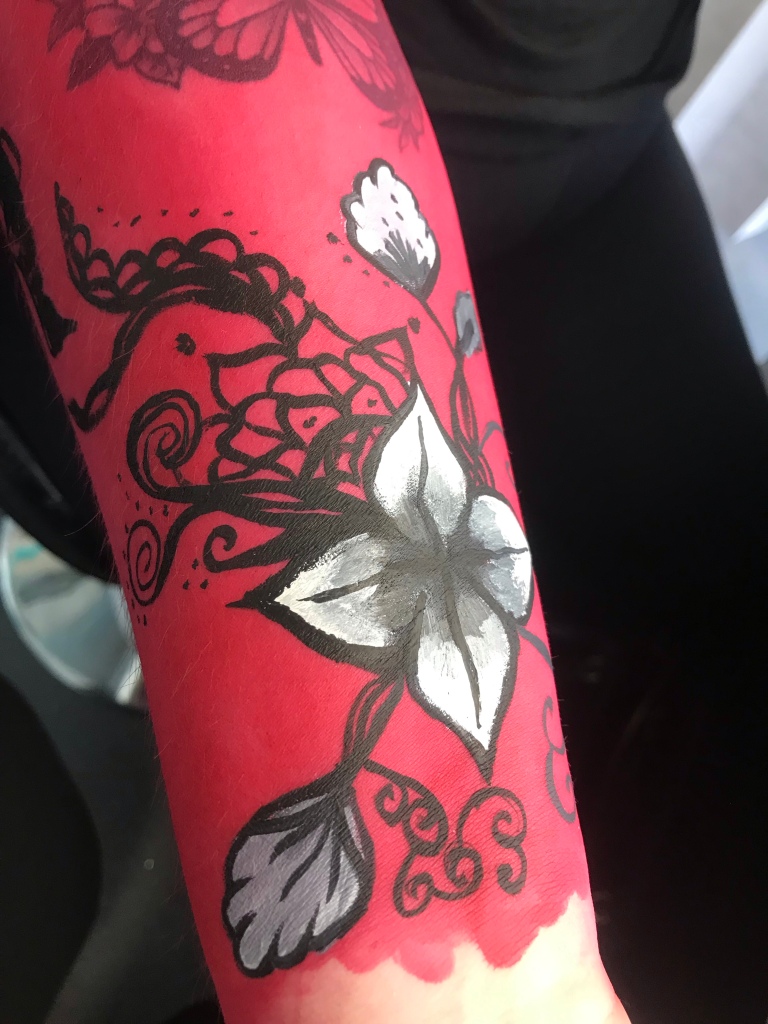
The image below is a design I created during a body art lesson at college. I decided to create a more intricate design, as I love line work – as I have just mentioned!
I also decided to experiment with using a more simplistic colour palette for this look, combining blacks, whites and greys together, and testing multiple blending techniques. This helped to build my knowledge ready for creating my final image.
Firstly, I am so impressed with how flawless this base application was. I mixed the paints to a creamy consistency, and then applied them to the skin with a brush. Next, I used a damp sponge to completely blend the product, ensuring there were no streaks. This technique worked really well and I will most definitely be using this in my final assessment.
Being a perfectionist, the appearance of the dots irritates me, as they are not all even. Therefore, if I created a look like this again I would use the handle end of the brush, rather than the bristles, to ensure all of the dots looked the same. Alternatively, I could also use a cotton bud to create the same effect.
Heated styling
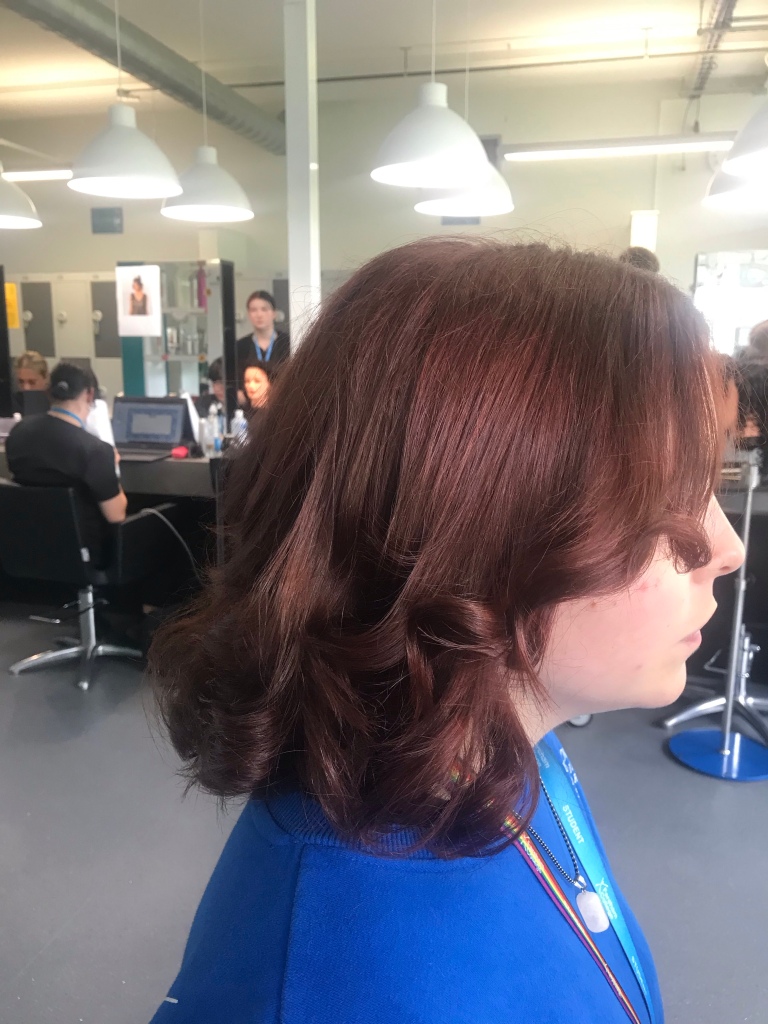
Below are some hair styles I have created to aid in developing my skills in heated styling.
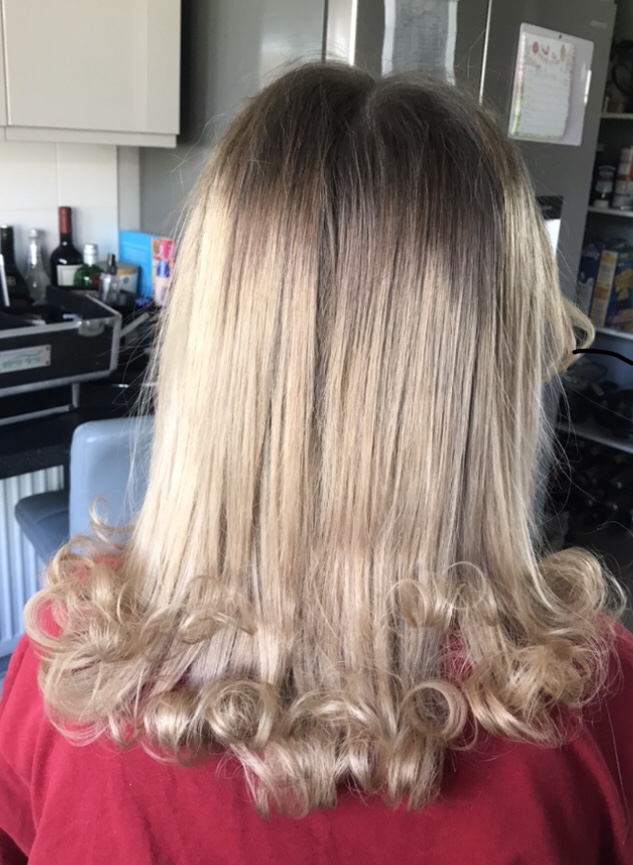
Firstly, I have a photo of a curled brush blow dry I completed in a lesson at college. I am extremely happy with the result, especially as I have never created this style on such short hair before, so was unsure of what the outcome would be like.
It was especially nice to see how happy my client was with this hairstyle, especially when she told me this isn’t a style she would have tried on herself but she loves it so much she will definitely be re-creating this look often.
Additionally, the photograph below shows a look I created outside of college.
Using hair straighteners to flick the hair out, I created a 1950’s inspired hair style. I am so happy with the overall result, however, if I was to create this look again I would ensure all the flicks were level, as some are higher up the head than others.
Hair styling
Below are some photos of some hair styling development I have crated during my time at college.
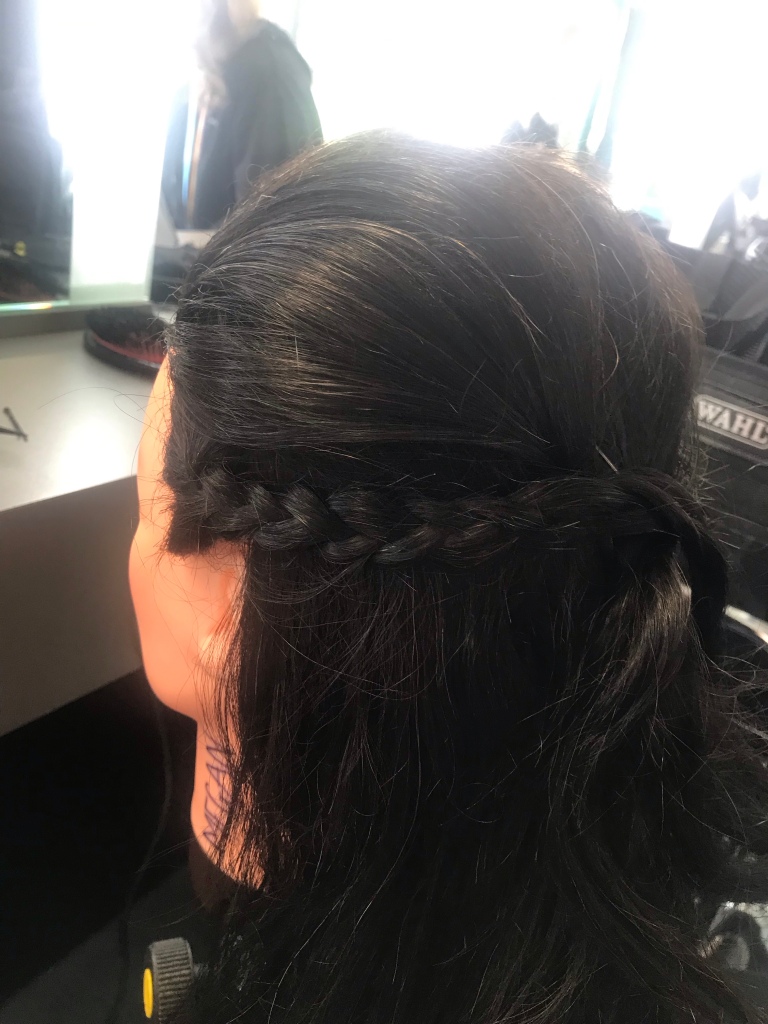
This first image is of a trial run I created for my fantasy hair style look.
I used back combing to create a small beehive with the top section of hair, curling the underneath, and braiding two sides to join at the back. I am really pleased with the end result of this look and wish I had brought in the faux plants to help truly represent my idea.
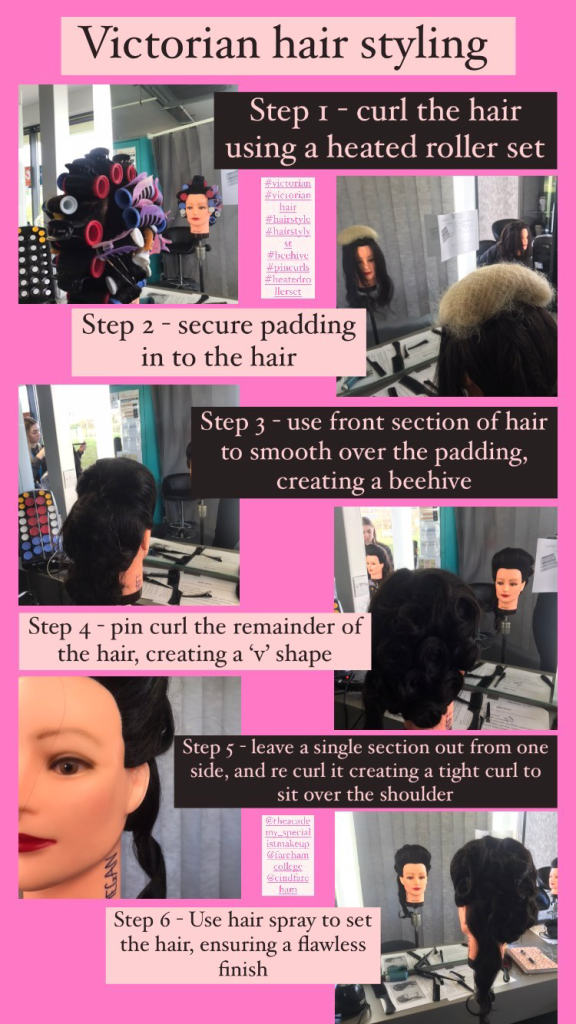
Next, I have attached a photo of a step by step guide I created, on how to re-create a Victorian inspired hair style.
This lesson helped me to combine multiple techniques together, creating a more complex final image.
I have never done anything like this before and absolutely loved learning how to combine the techniques I have learned thought the year. This helped me start to think about how I could create a more complex hair plan for the female version of the statue makeup, had I chosen it for my final design.
Design practice
Vampire makeup
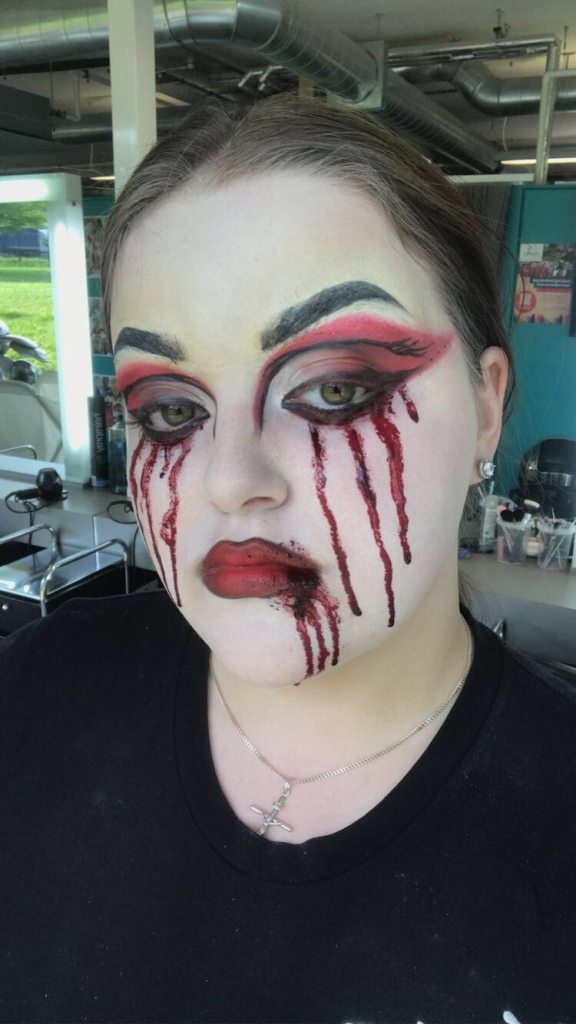
Below, is an image of a trial I created of my vampire design.
I am happy with the overall look, and feel I have represented my design well.
However, I blocked out my brows for this look and as I used a white foundation, you can still see some yellowness, from the colour corrector, around the eyes. Therefore, if I was to re-create this, I would spend more time on covering the brows, to ensure no product would pull through. I would also use a higher coverage foundation.
Despite this, I am happy with the overall look, and I am so impressed with my symmetry on the line work, including the eyeliner and drawing on the brows.
Although I like this look, It confirmed the worries I had when designing this look, as I don’t feel like it immediately portrays fantasy, but rather represents the horror genre.
Formative assessment – Stone creature
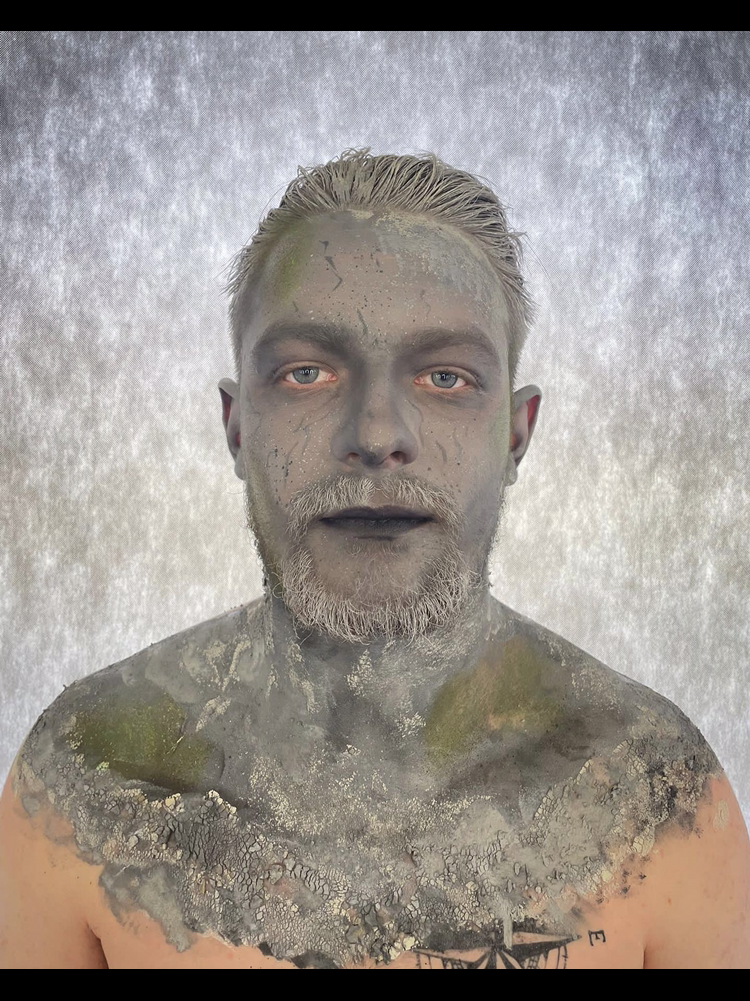
Below is a photograph from my formative assessment ( assessment practice), and my first full trial of the stone giant makeup. This look was a very much trust the process, as at various points in the making of this I was really unsure on weather I would like it.
However once the look was finished and had all tied together I knew immediately that I would use the male version of this design for my FMP, instead of the female. Despite my concerns when designing both looks, I feel the male look if far more effective.
During my final assessment I will ensure to add props, prosthetics, and additional techniques, to further develop this design. This will allow me to showcase my work at it’s full potential, and show I am willing to continuously develop my work.
I also must ensure that in my final assessment I bring the paint right up to the water line, as well as in to the ears, and around the back of the neck.